Happy Birthday to me!!!! I celebrated my birthday last weekend and decided that I needed a weekly kit to commemorate the week in my planner so I created the Kawaii Birthday Weekly Kit. Although I had a small birthday kit it just wasn’t enough to do a full week’s spread. I love how the kit came out and also am thrilled that in addition to the Erin Condren Vertical and Erin Condren Horizontal sizes I now offer most of the weekly planner sticker kits in the Happy Planner and Mini Happy Planner sizes. My birthday week was the first time I used the Mini HP and I ended up loving the format. It is a horizontal, which is what I started out with and find to be the most versatile. Because the stickers for the Mini are so much smaller I ended up with space to add some extras that aren’t in the regular weekly kits. Every Mini Happy Planner set comes with top washi strips, chevron strips, thin washi dividers and to do headers. The sets are super cute and the perfect way to dress up your planner.

Disclosure: Some of the links below are affiliate links, meaning, at no additional cost to you, I will earn a commission if you click through and make a purchase.
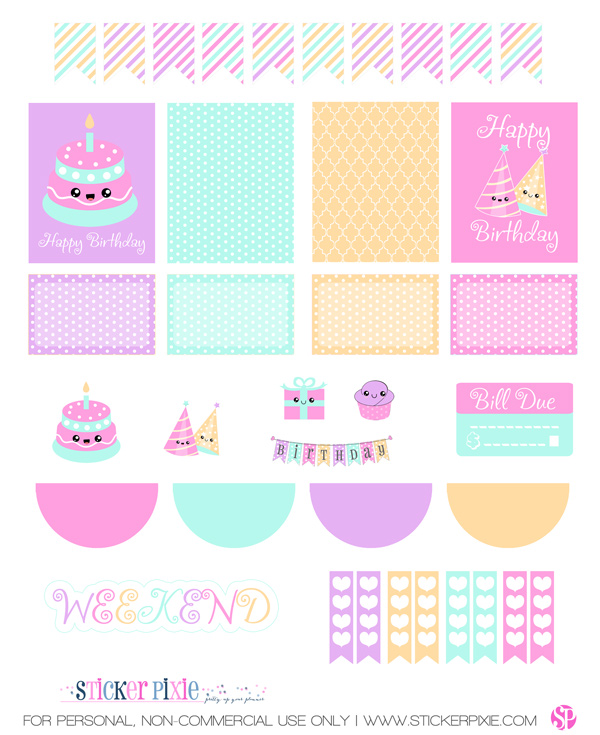
I also wanted to say thank you for all the warm birthday wishes and so I created another freebie that matches the Kawaii Birthday collection. It has some of the elements from the Kawaii Birthday kit as well as some unique elements. It’s available in both .png and .psd formats. I use a Silhouette portrait with the Designer software and prefer the .png files, but have also provided the .psd for those who prefer that file format.
PDF Details:
- 37 planner stickers sized to an 8 1/2″ by 11″ pdf file
- File size: Large 4.2 MB
- 300 dpi for crisp prints
- Collection: Kawaii Birthday
PNG Details:
- 37 planner stickers sized to an 8 1/2″ by 11″ png file
- File size: Large 3.11 MB
- 300 dpi for crisp prints
- Collection: Kawaii Birthday
How do I use this?
Please note that the boxes are created with a bleed area. This is ideal if using a silhouette because you can create your boxes with the box tool and insure you don’t have any white around the edges. If cutting by hand you will need to cut in slightly to fit the box correctly to a 1.5″ wide space.
- If you have a silhouette or other cutter you can import the image and then create your cutlines. I prefer just opening the .png file and creating cutlines from that, but you can also use the pdf if you have the designer edition. The pdf file should also work for other cutting machines.
- Use heavyweight printer paper or cardstock, print the images, cut and use a glue pen or roller to adhere the pieces.
- Print on sticker or label paper and then carefully cut by hand. If you have a steady hand sharp scissors work great – if not a clear ruler, x-acto knife and cutting mat are your easiest bet. Once the pieces are cut you can either peel from the edge or slightly slice the back with an x-acto to create an easier to peel surface.
Terms:
- For PERSONAL USE ONLY.
- You MAY NOT RESELL, redistribute, or claim the original or derivative designs as your own (that would be stealing).
- Please credit StickerPixie and link back to me (http://stickerpixie.com) if you post this page on the internet. Would love to see your layouts if you post on instagram you can tag me at @stickerpixie or #stickerpixie. Thank you!
xoxo,

Leave a Reply